Introduction
Adding further information to the created presentation is easy with SlideFab. This tutorial will explain how to write PowerPoint slide notes based on data in Excel automatically.
Overview
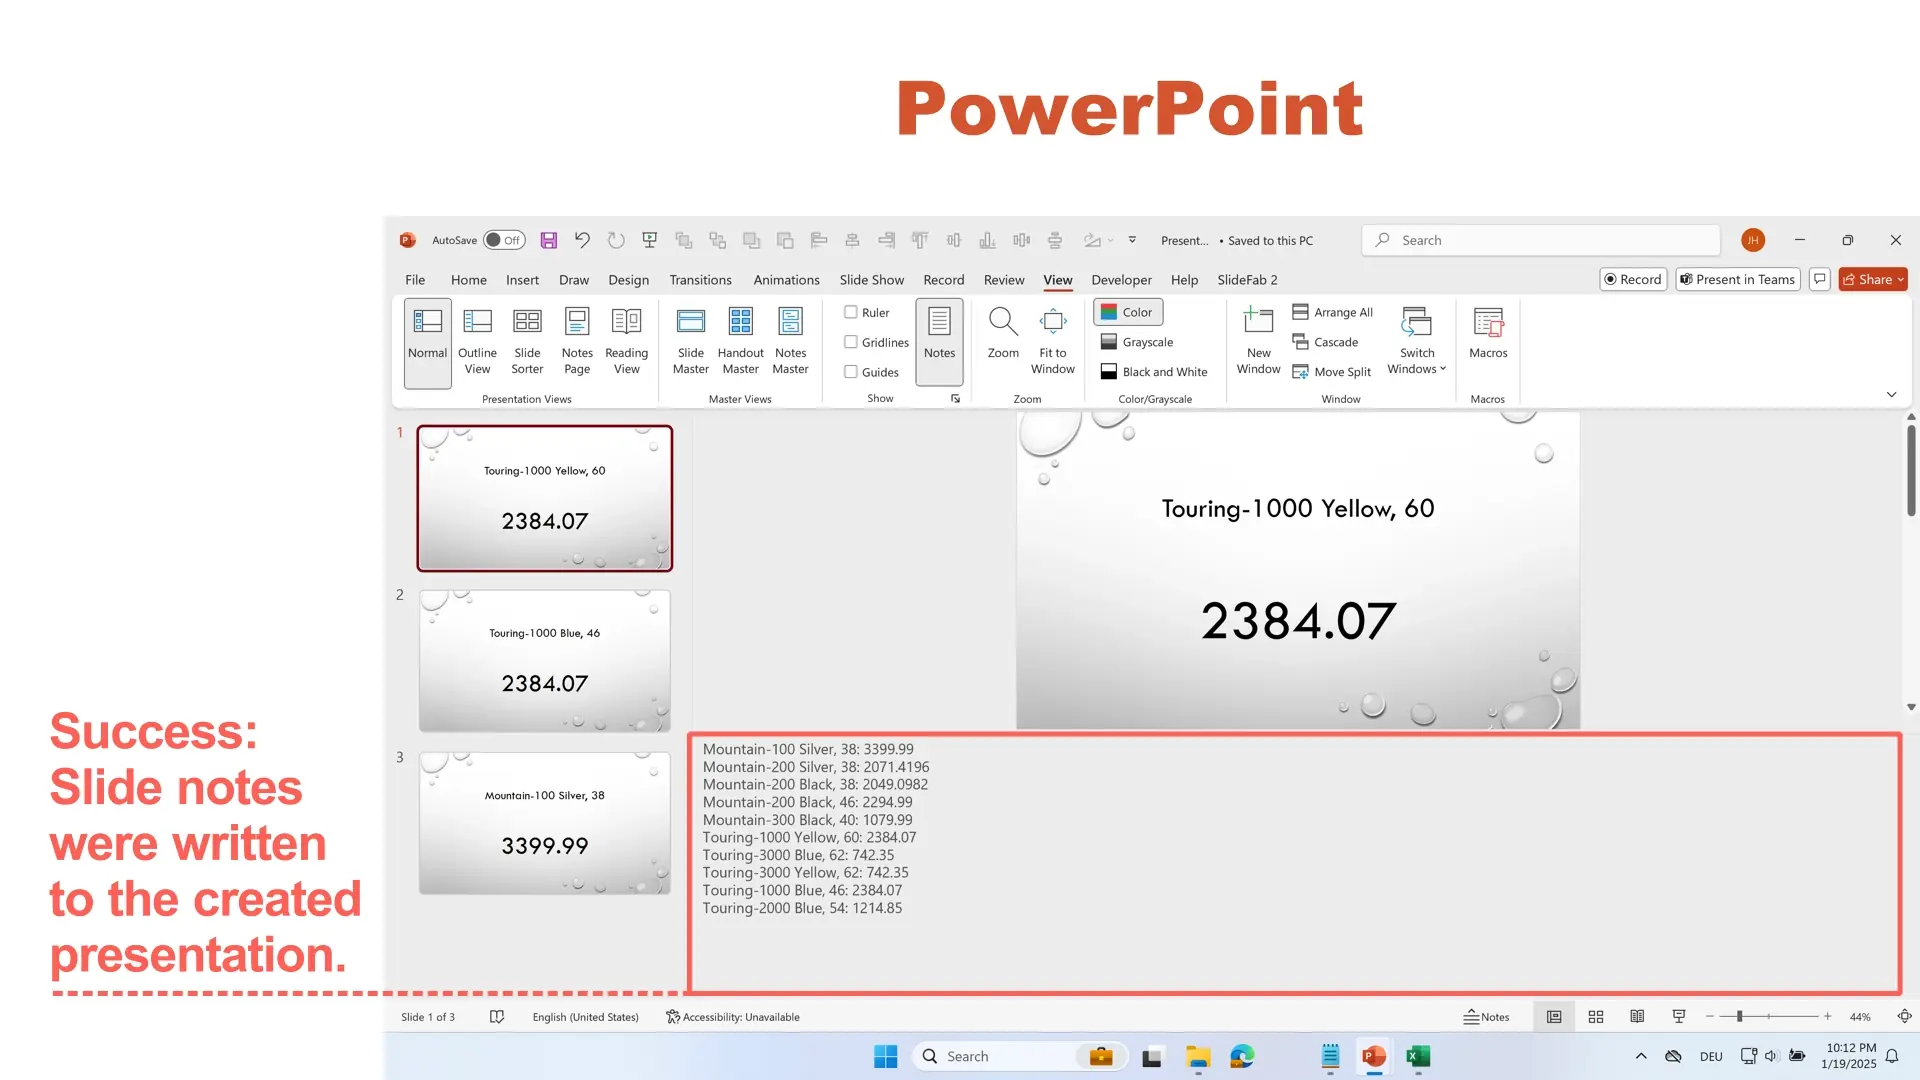
This tutorial builds upon the previous tutorial. It was about filtering the price tags in ascending way from cheapest to most expensive. Here we will add the price list to the slide notes for all slides created.
What is required for this tutorial on How to write PowerPoint slide notes automatically
We will start with the template PowerPoint presentation that SlideFab linked to the Excel workbook. It contains the Iteration Loop and the links between shapes and Excel cells. Moreover, it contains the sort order calculation and the top 3 filtering from before. This is the Excel we will start with:

To automate writing helpful information to the slide notes, follow these steps.
Time needed: 10 minutes
- Setting up the Excel workbook and PowerPoint presentation in a linked way.
– Open the PowerPoint presentation and the linked Excel file as explained before.
– Click the button “Slide Linking” within the SlideFab tab in the ribbon to open the side pane (as explained here).
– Select the template slide (in case it isn’t so far) and expand the “Selected Slide” control within the Slide Linking side pane (as explained here).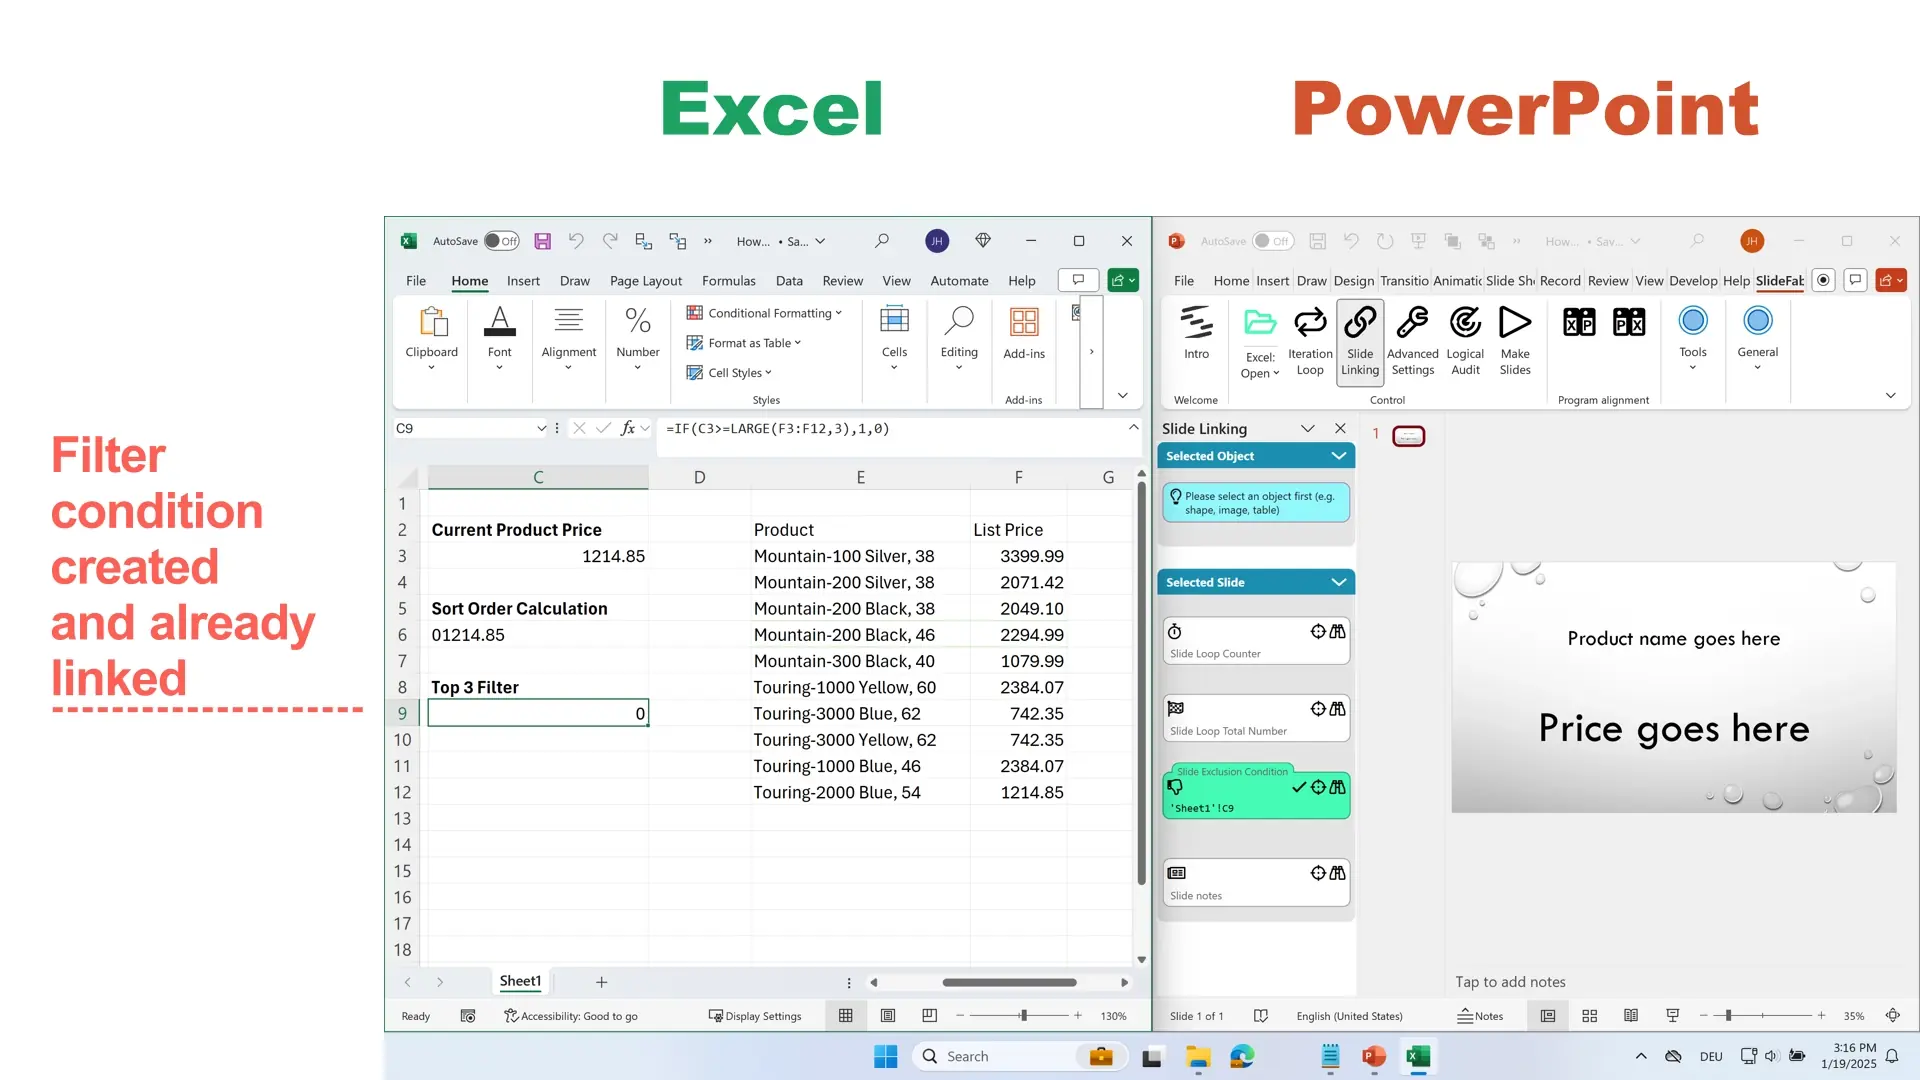

- Create an Excel formula to calculate the slide notes content
For this tutorial a nifty formula calculates the list of product names and prices for the slide nodes field. First of all, the formula uses a combination of
BYROWandLAMBDAto apply a concatenation for every rowrwithin the rangeE3:F12. TheTEXTJOINfunction does the concatenation of names and prices here. This leads to an interim result consisting of a single column of texts (which is kept in memory and not written to the worksheet). Secondly, the otherTEXTJOINcombines these into one text where all the rows are separated with a new line. The colours here shall make reading simpler.=TEXTJOIN("
",TRUE,BYROW(E3:F12,LAMBDA(r,TEXTJOIN(": ",FALSE,r))))
This formula does not depend on Master CellC3. So the automation writes the same information to all output slides. Of course, with a dependency on the Master Cell it would have been possible to write different contents to all slide notes respectively.
Add the formula from above to cellC12.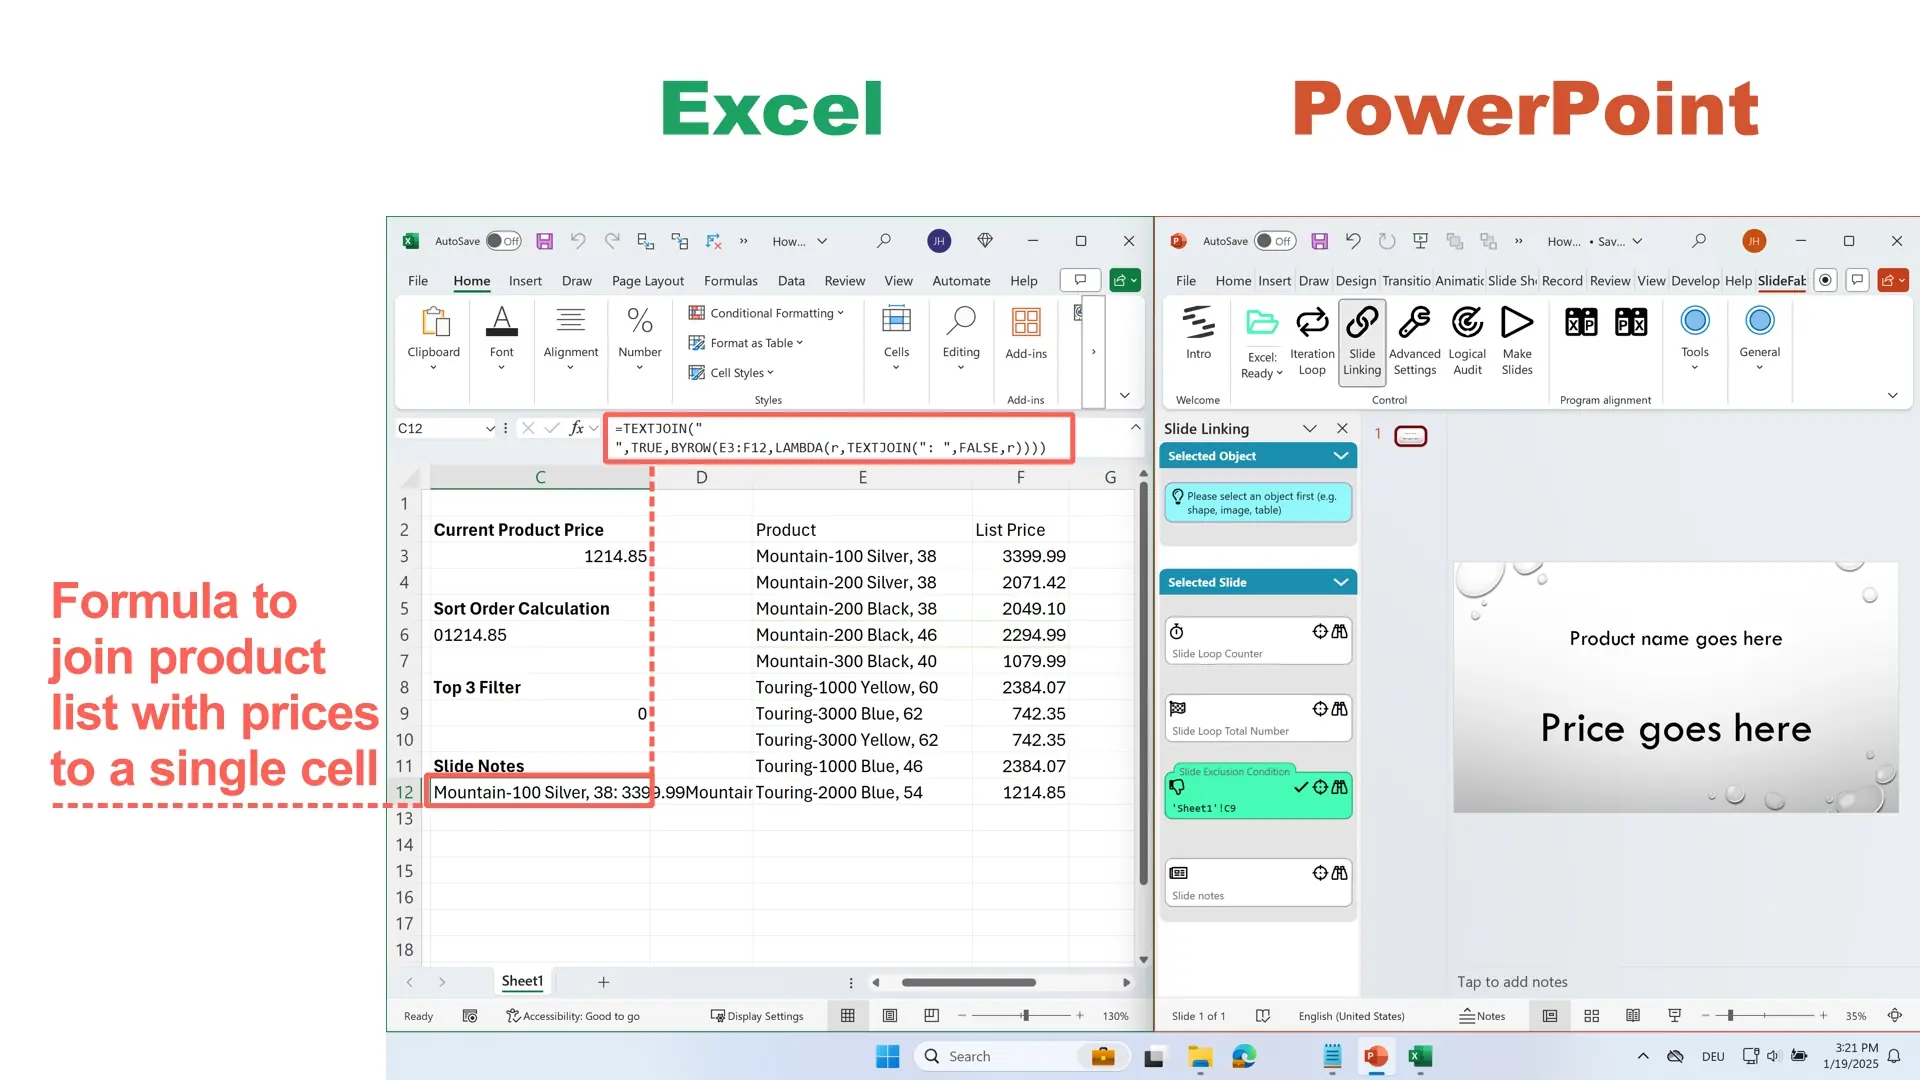
- Link the new formula with the PowerPoint slide through SlideFab
– Select cell
C12with the new text calculation.
– Find the Slide Notes control.
– Click the crosshair icon in the “Slide Notes” control to define the link. SlideFab will write the address of the selected cell into the control field.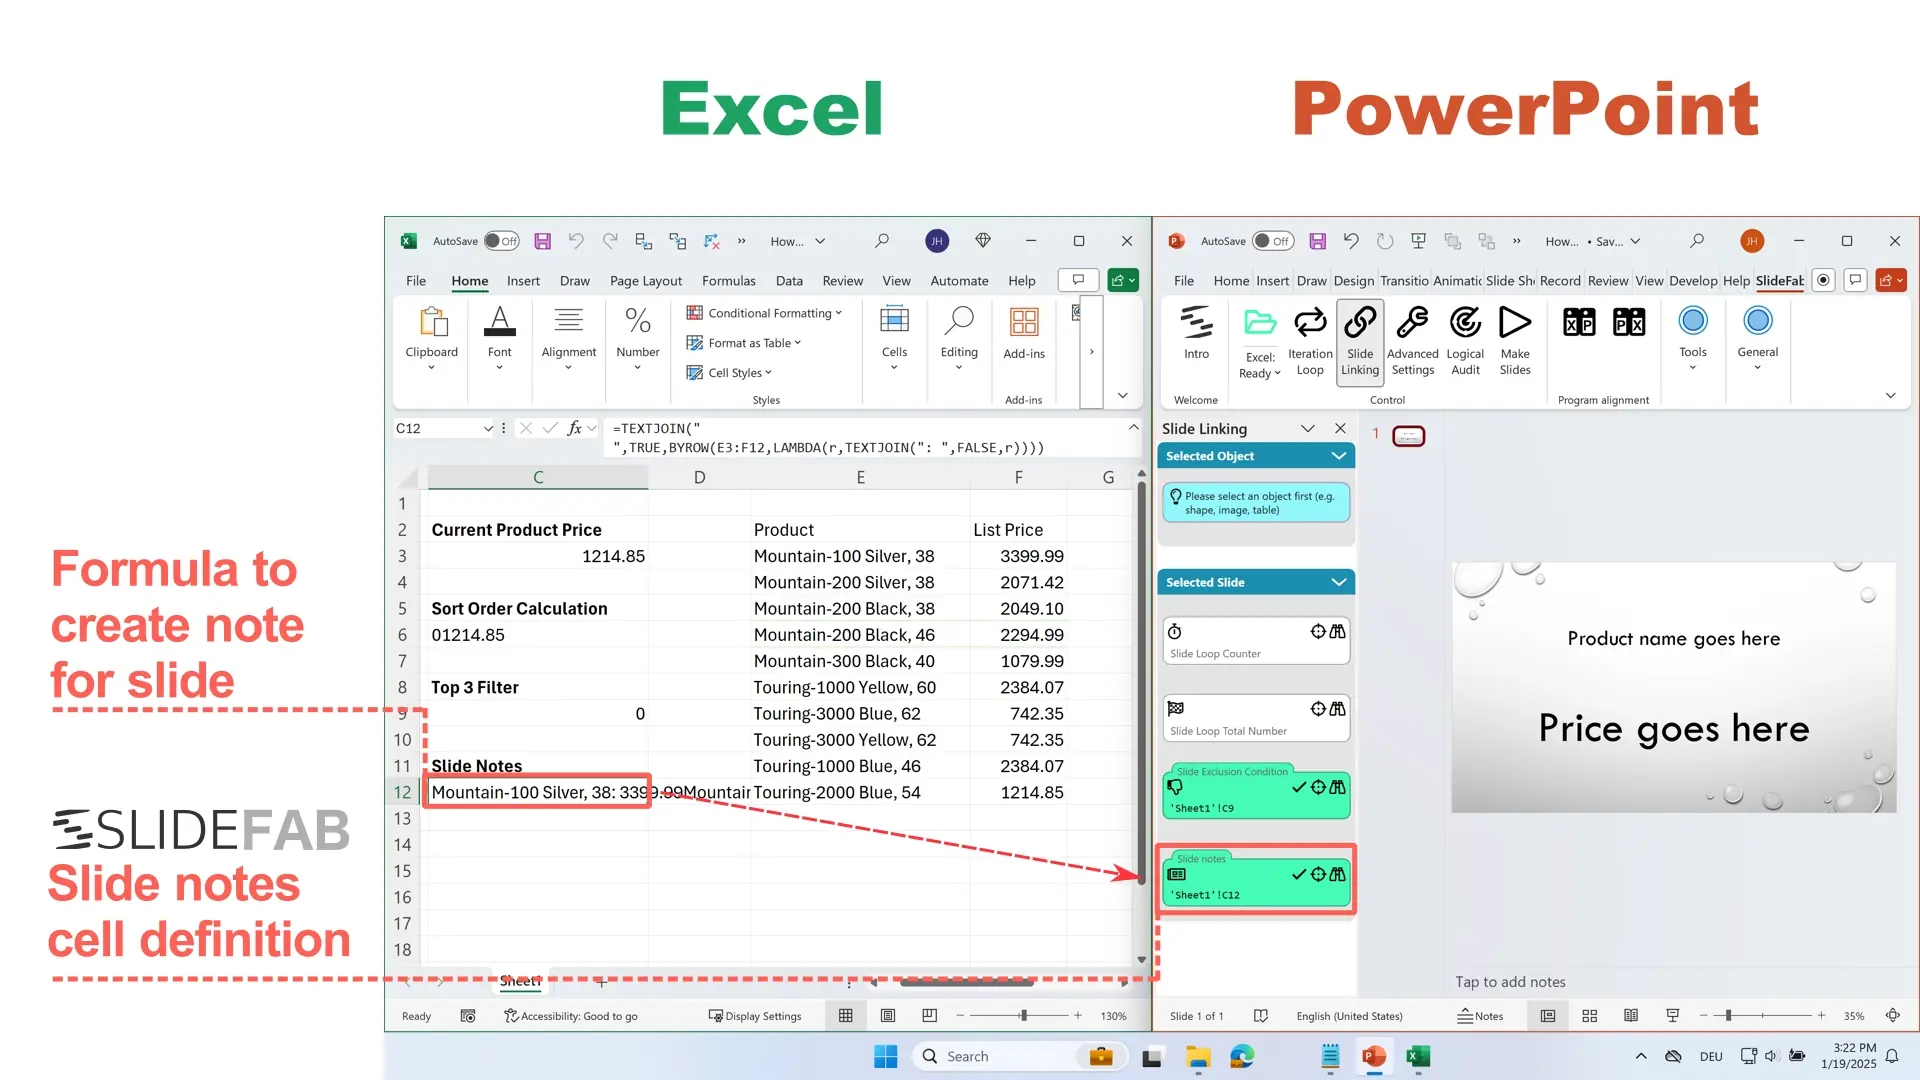
- Now it’s time to make some slides with the slide notes definition in place
We will create the slides by clicking “Make Slides” and then hitting “Start” in the window that opens. How this is done was pictured in a previous tutorial.
The slide notes feature works as expected. SlideFab writes the pricing information into the slide notes field.