Introduction
This tutorial builds upon the previous one which created the automation to create one PowerPoint slide per Excel row.
What is required for this step on How to connect Excel to PowerPoint
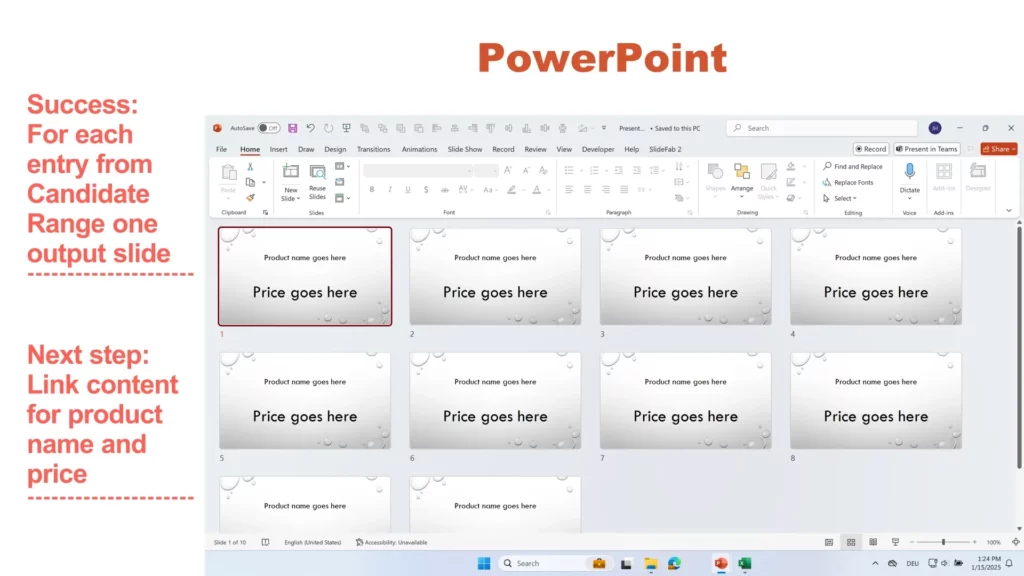
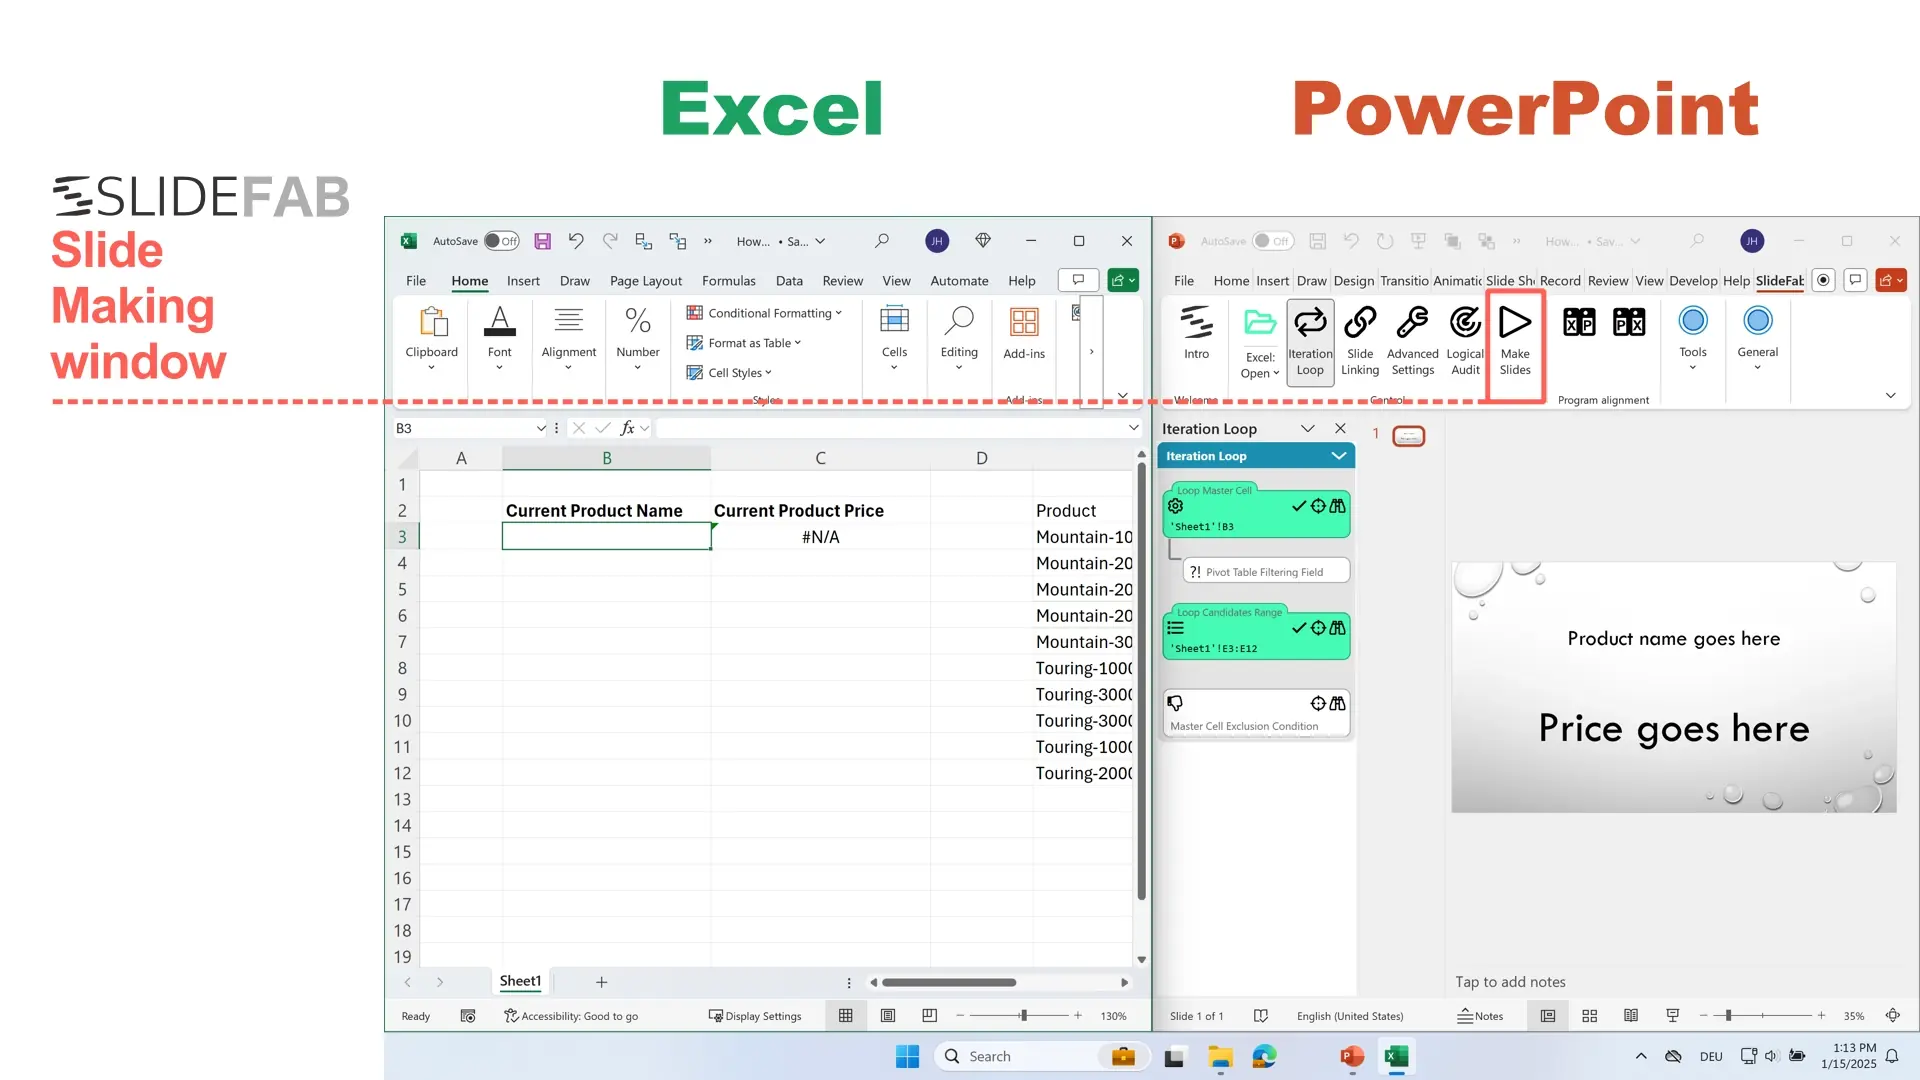
We will start with the template PowerPoint presentation that SlideFab linked to the Excel workbook and for which it has the iteration loop in place. The output slides created so far still miss product names and prices.
Apart from that an understanding of lookup formulas is helpful for this step. In particular, we will use XLOOKUP here. But if you know VLOOKUP, then this won’t challenge you.
For this example the product price for the current product will be in cell C3. As SlideFab only writes the values from the Candidate Range into the Master Cell, more is required to also get the current product price. In fact, an Excel XLOOKUP formula (see below) using the value from the Master Cell in B3 will retrieve the product price. It merely searches the product name within the candidate range E3:E12 and then returns the price from the neighbouring cell column F.
=XLOOKUP(B3,E3:E12,F3:F12)As SlideFab writes the product name into the Master Cell in each loop, this price lookup formulas refreshes automatically.
Follow these steps to connect Excel to PowerPoint such that the texts from the cells are written into the shapes
Time needed: 4 minutes
- Creating the connection for the product name
– Open the Slide Linking side pane from the SlideFab tab in the PowerPoint ribbon.– Select the Master Cell which contains the current product name in each loop.
– Select the target shape in PowerPoint (the one with “Product name goes here”).
– Click the cross hair icon in the “Excel Source Range” to define the link. SlideFab will write the address of the selected cell into the control field.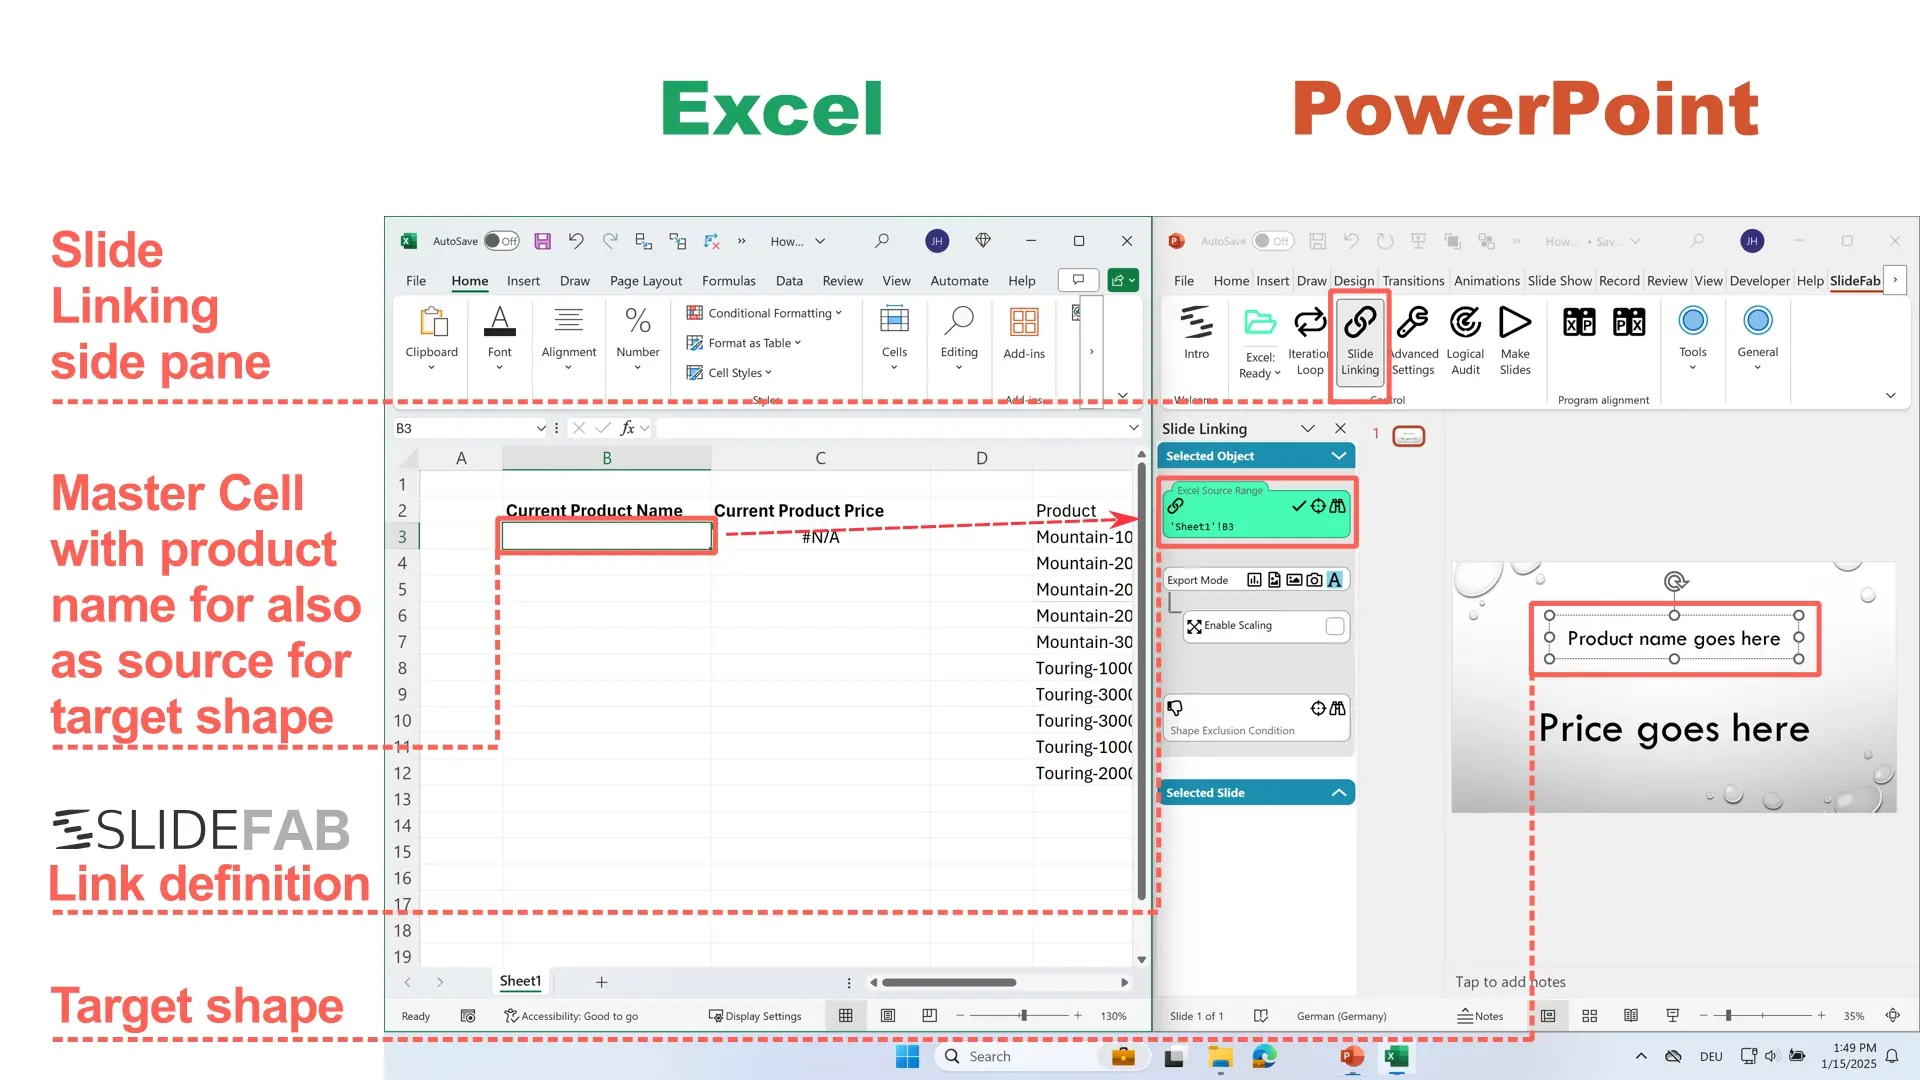

- Setting up the connection for the product price
– Select the cell C3 which contains the current product price in each loop (formula is explained above).
– Select the target shape in PowerPoint (the one with “Price goes here”).
– Click the cross hair icon in the “Excel Source Range” to define the link. SlideFab will write the address of the selected cell into the control field.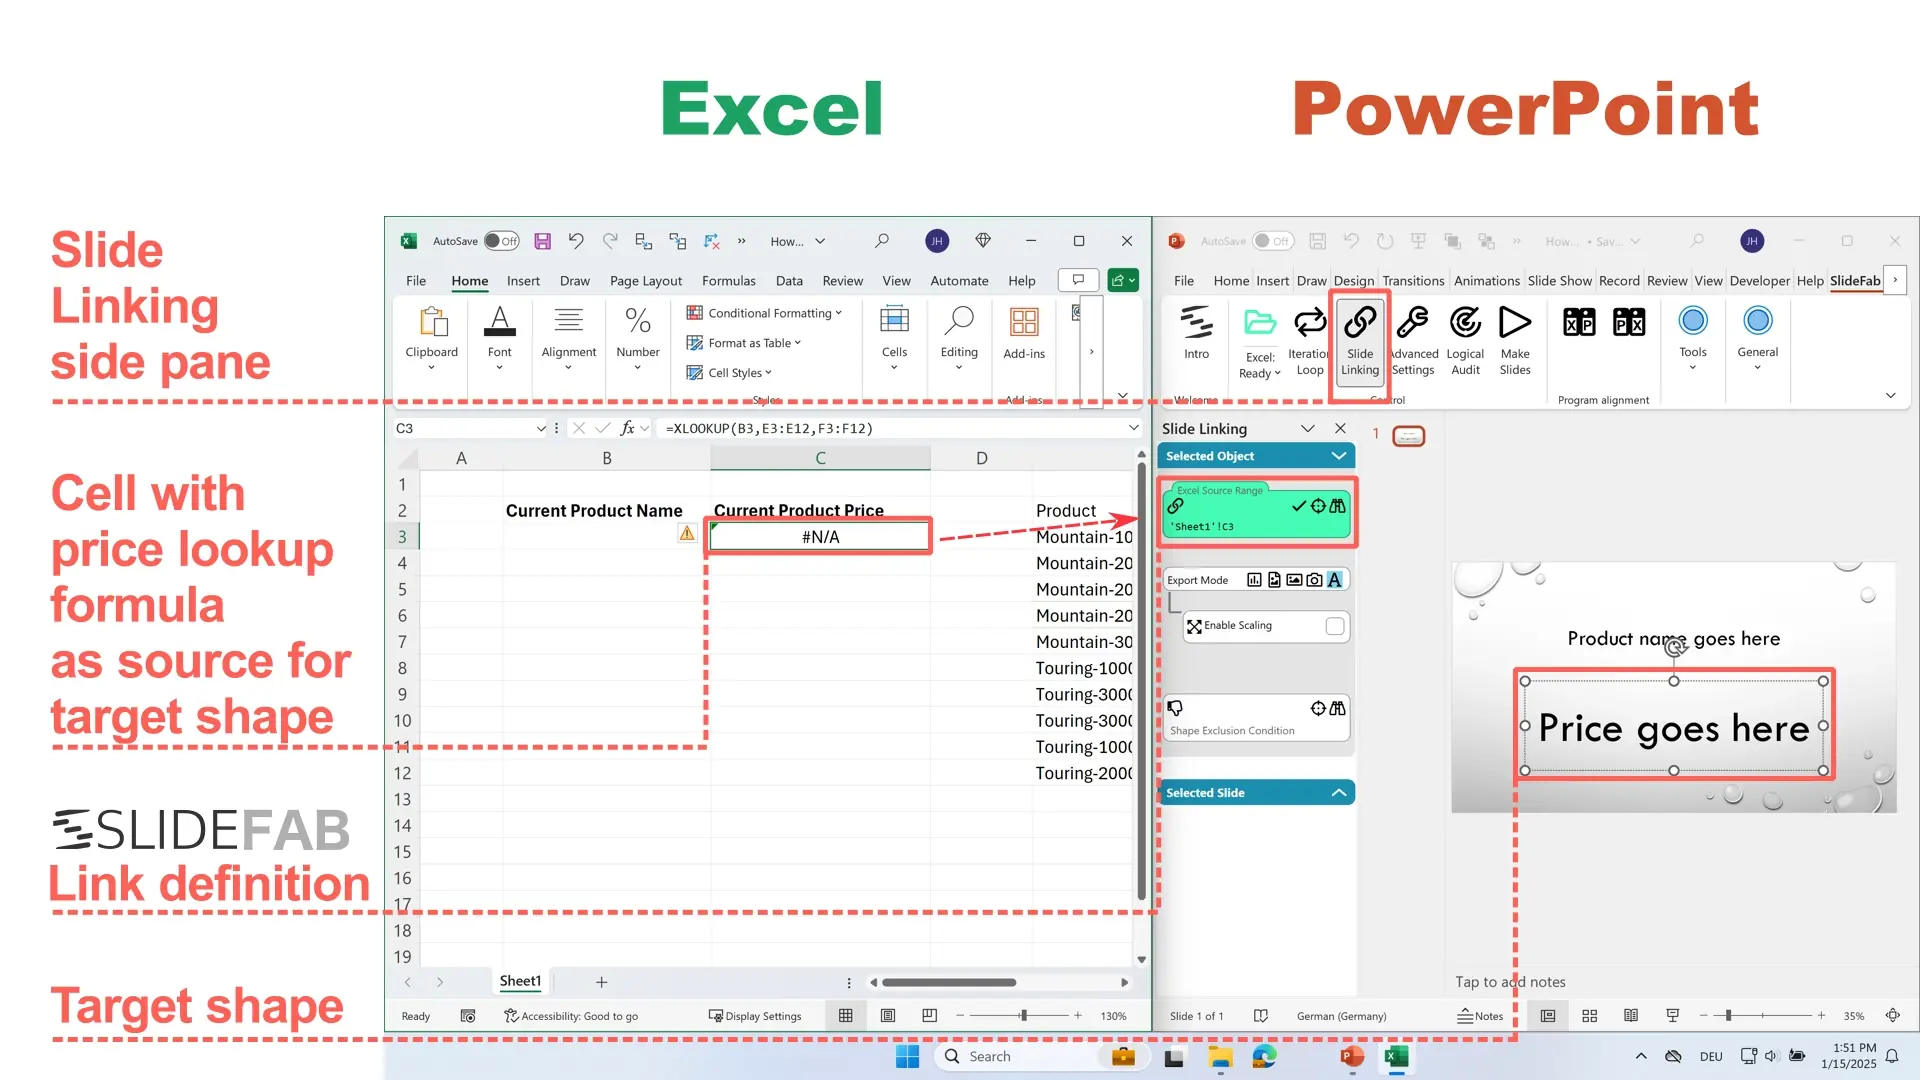
- Click the “Make Slides” button in the SlideFab tab of the Powerpoint ribbon to open up the actual window for this.
- When hitting the “Start” button, SlideFab will run the automation

- Checking the created output, again
Short recap: So far we linked the Excel file and the PowerPoint presentation. Additionally, we also set up the iteration loop. And we also created the connection between Excel and PowerPoint for the shapes to be written to containing product name and product price.
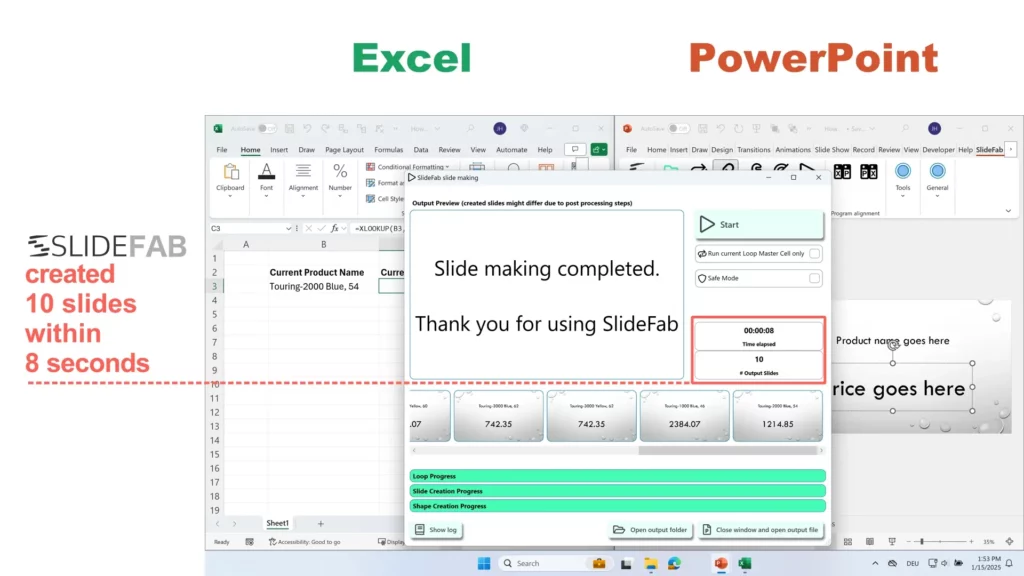
So we expect one slide per row with the product name and price. And in fact, it worked properly.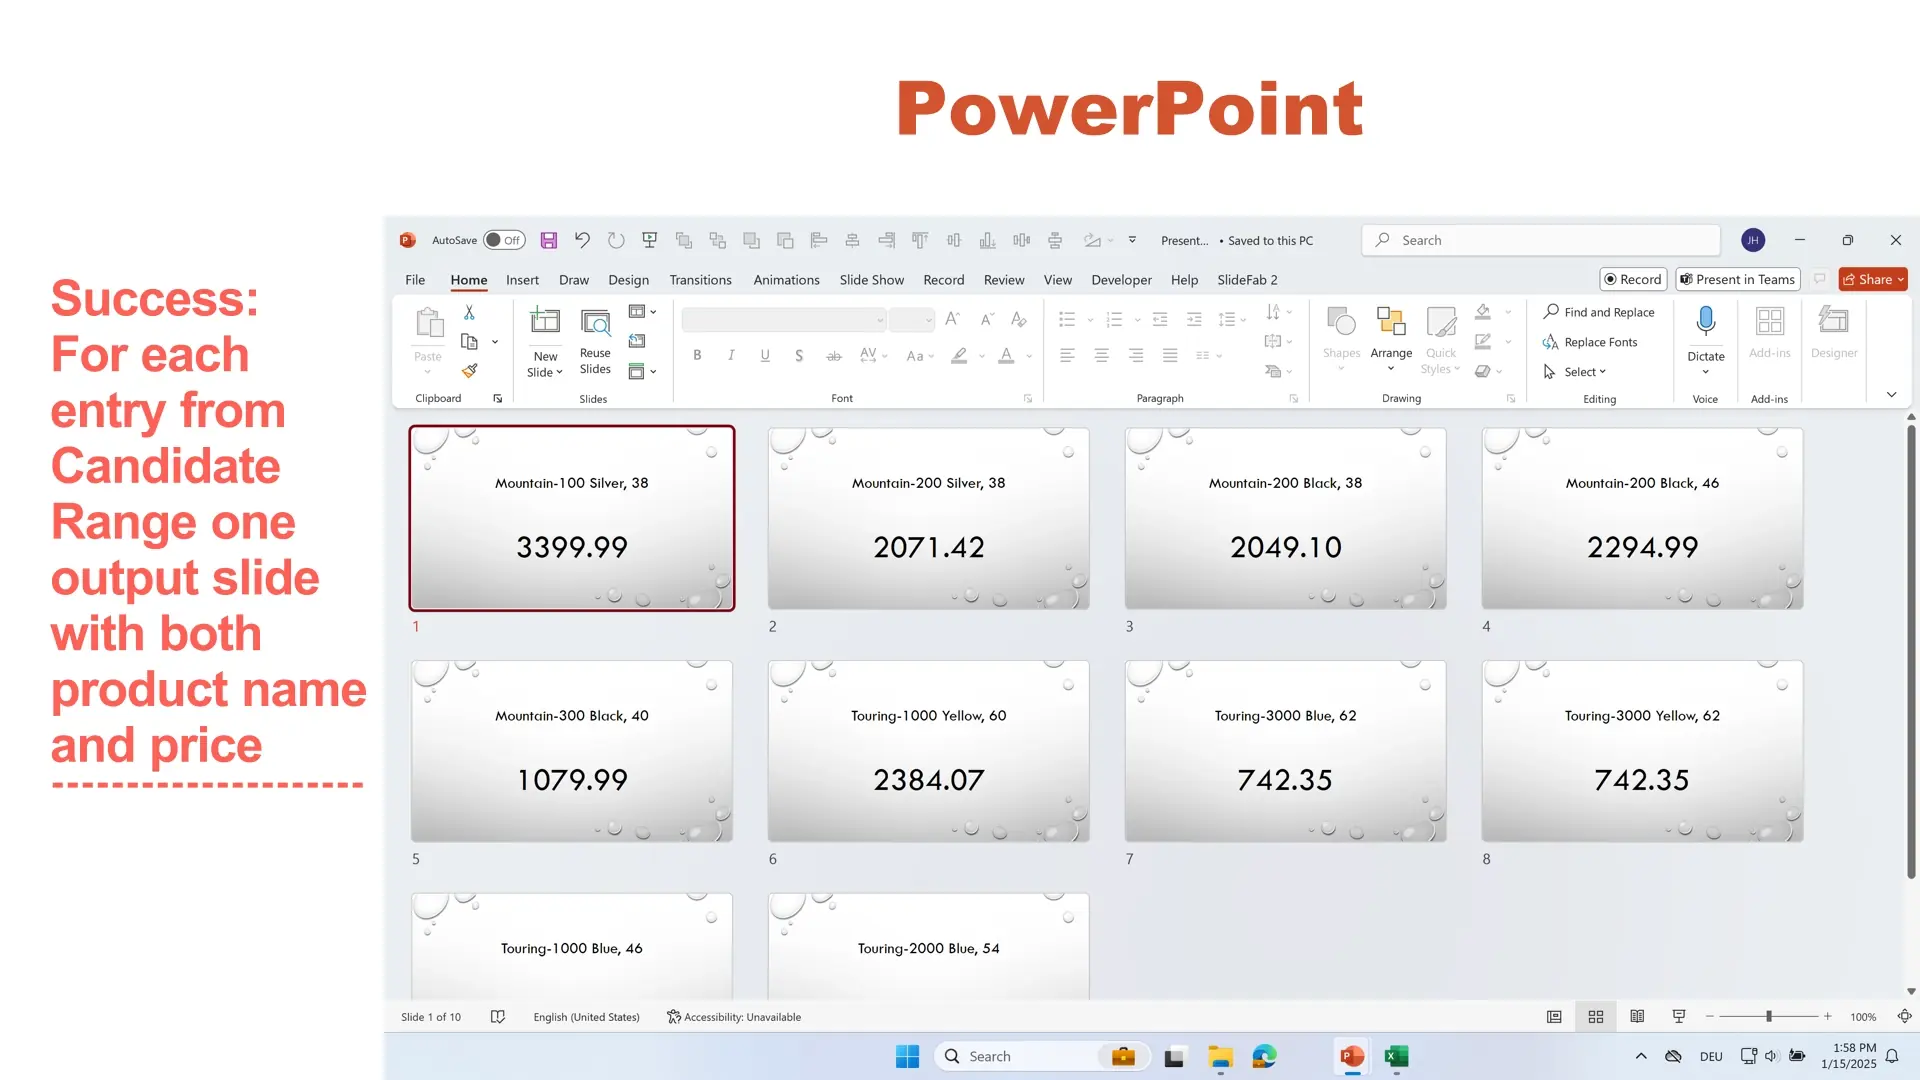
Besides. How long did it take SlideFab to create these?
The task to create PowerPoint slides with a little bit of text is very easy for SlideFab. Excel calculates the XLookup also in no time. Accordingly, SlideFab required 8 seconds to build and populate the 10 output slides. Of course, charts or tables take longer. But still this is all way faster than doing it manually.